Analysis with Targets
The target analysis in the ‘Data-set Explorer’ can be done with the option given from the menu item. From there, the user should go to ‘Save Target’ option and after that the following pop up will be opened where the user can save the targets of the chart values.
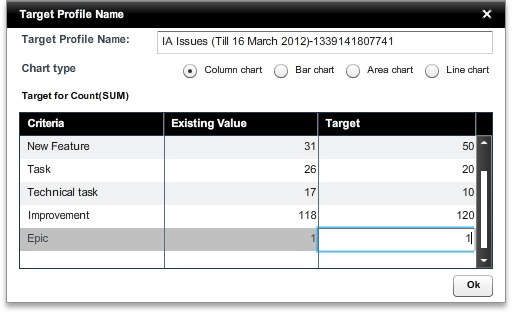
The rows present in the ‘Target’ column, are editable as shown in the above picture. In the ‘Target Profile Name’ field, the user should give a meaningful name for the target. Different types of chart selection options are there. After filling all those fields and clicking on the ‘Ok’ button, the target profile will be saved. But the target will only be applicable for the fact column selected in the ‘Step-1’ of the Dataset Explorer and on the selected chart type at the time of creating target profile. User can also apply target profile for more than at a time, if multiple facts are selected in Dataset Explorer.
To load a target profile, user should go to the ‘Target’ option from the menu bar of Dataset Explorer, and then click the ‘Load target(s)’ option to go to existing target profile list pop up like the following one.
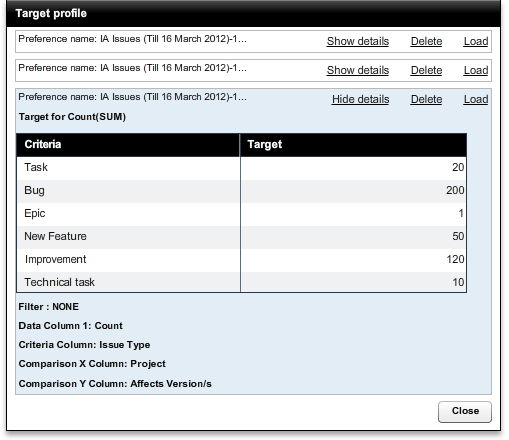
Now, the user should load the target profile from the list. To see details of a target profile, one should click on the ‘Show Details’ link button. A target profile can also be deleted. And to load, user should click on the ‘Load’ link button. After that the profile will be loaded in the ‘Step-4’ region of Dataset Explorer like the following.
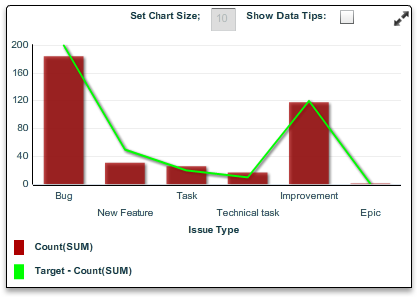
In the above graph, the continuous line shows the targets for that graph. It basically connects the three target values used for the target as shown in the previous images.
Created with the Personal Edition of HelpNDoc: Easily create iPhone documentation